
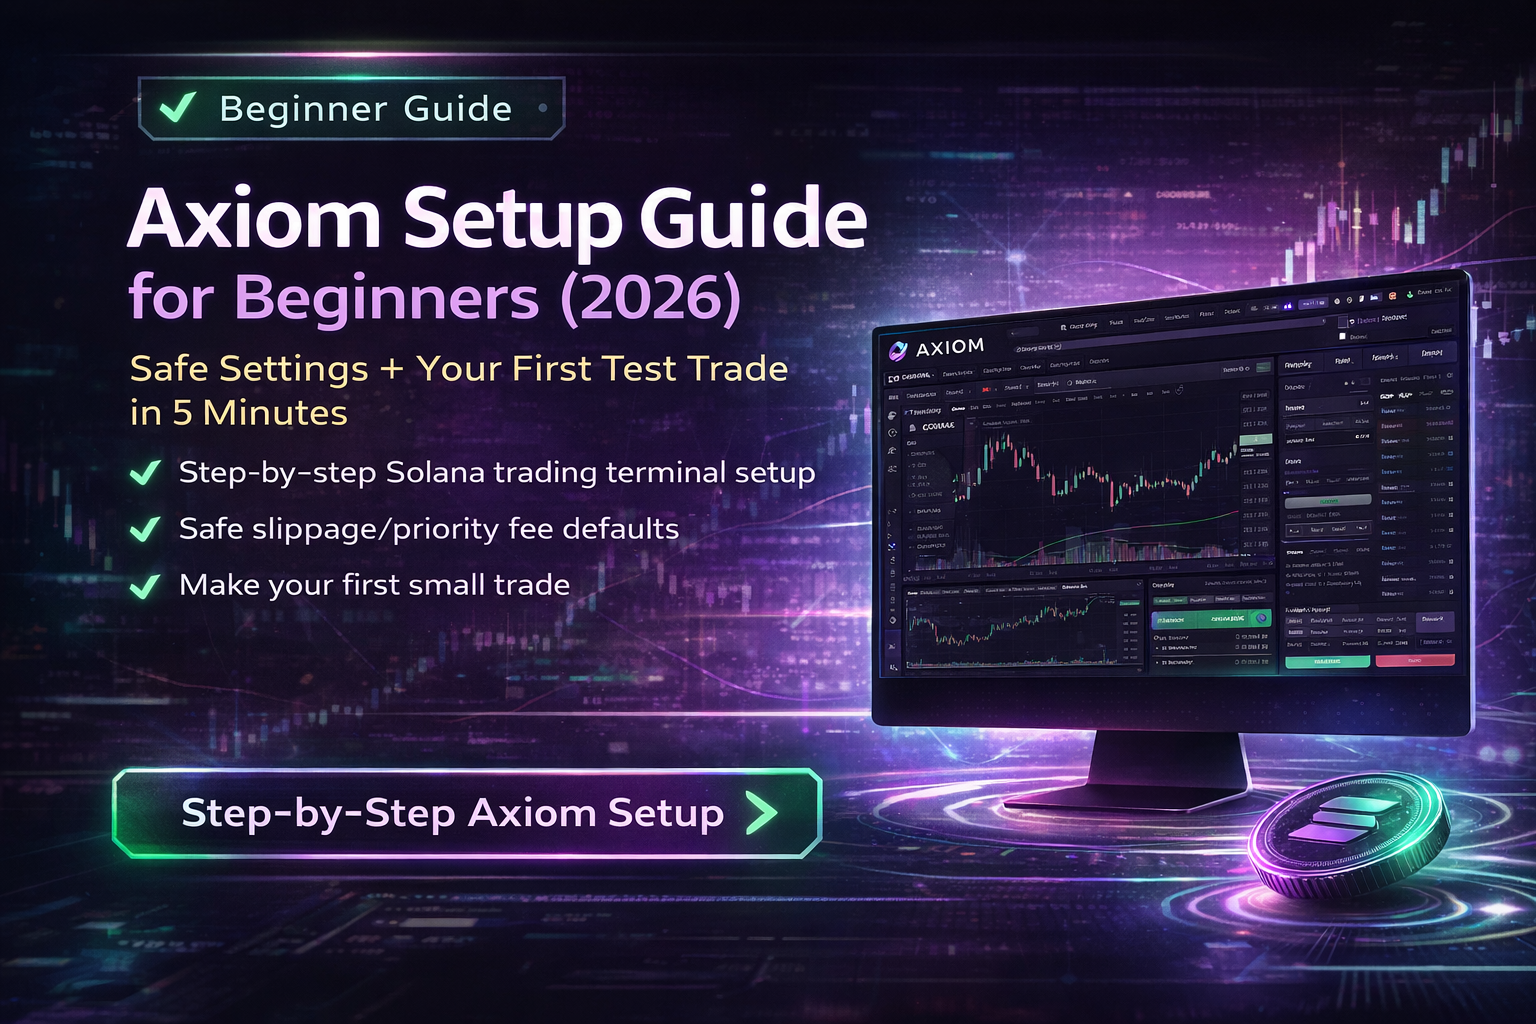
Axiom Trade Setup for Beginners (2026): Safe Settings + Your First Test Trade in 5 Minutes
Axiom Trade Setup for Beginners (2026): Safe Settings + Your First Test Trade in 5 Minutes
In This Guide
- What Is Axiom Trade?
- Axiom vs Trojan vs GMGN — Quick Comparison
- Why Start From This Link?
- Pre-Setup Checklist
- Axiom Setup (Steps 1–4)
- Axiom Trade Setup: Settings (Beginner Defaults)
- Axiom Trade Setup: Your First Test Trade
- Axiom Trade Setup: Key Features
- Axiom Trade Setup: Safe Test Rules
- Axiom Trade Setup: FAQ
- Real Beginner Scenarios
- 3-Line Quick Start
- Completion Checklist
You Want a Full Trading Terminal — Not Just a Telegram Bot. I Get It.
This is a step-by-step Axiom Trade setup guide — safe settings, your first test trade, and everything you need to start trading on Solana’s most feature-rich web terminal.
If you’re looking for an Axiom Trade setup for beginners, you’re in the right place. This Axiom setup guide is part of our Best Solana Trading Bots series — but focuses only on how to use Axiom from scratch, with safe settings.
You’ve probably seen people talking about sniping new launches, tracking whale wallets, or one-click trading on Solana. Maybe you’ve seen a screenshot of someone catching a migration early and flipping a small SOL position into a big win.
And your first thought was: “That sounds great, but I want to actually see charts and data — not just tap buttons in Telegram.”
That’s exactly what Axiom was built for. It’s a web-based trading terminal — think Dexscreener meets a real trading desk, with execution built in. No Telegram required.
Most beginners don’t lose money because Axiom is bad — they lose money because they skip the Axiom Trade setup basics, ignore safety settings, and rush in with too much capital.
This guide is different.
I’m going to walk you through Axiom Trade — a Y Combinator-backed web terminal that’s become one of the highest-volume Solana trading platforms — step by step. No jargon. No skipped steps. And no pressure to risk more than a few dollars.
By the end, you’ll have your Axiom Trade setup complete in your browser, configured safely, and you’ll have completed your first small test trade — with full control.
Ready? Let’s go.
Always verify through Axiom’s official documentation · Backed by Y Combinator
What You’ll Learn (30-Second Summary)
- ✅ Open Axiom in your browser — sign up with email, Google, or Phantom wallet
- ✅ Create a non-custodial Solana wallet (or connect your existing one)
- ✅ Understand the key Axiom settings (slippage, priority fees, MEV protection)
- ✅ Learn how Pulse discovery, wallet tracking, and limit orders work
- ✅ Make a small, safe test trade — just to learn the flow
- ✅ Know exactly what to do next
Total time: Under 5 minutes if you already have SOL ready. If you need to buy SOL first, allow 10–20 minutes (Axiom has a built-in Coinbase on-ramp).
No coding. No Telegram. No complicated downloads. Just a browser and this Axiom Trade setup guide.
📌 Start Here (Related Guides)
→ Best Solana Trading Bots — Full Comparison
→ Solana Wallet Guide: Phantom Setup to First DEX Trade
→ Solana Priority Fees Explained
→ Best Slippage Settings for Solana Bots
→ Why Solana Bot Trades Fail (And How to Fix It)
What Is Axiom Trade? (Plain English, No Jargon)
Axiom is a web-based trading terminal built specifically for Solana. If you’ve searched for an Axiom Trade setup guide or how to use Axiom, here’s the simplest way to think about it:
Axiom is an all-in-one dashboard where you can discover new tokens, track whale wallets, monitor Twitter/X signals, execute trades with one click, set limit orders, and manage your portfolio — all without leaving your browser.
Here’s what Axiom can do:
- Buy and sell Solana tokens — one-click market orders and limit orders. According to Axiom’s documentation, their limit order engine is designed to land fills in ≤ 1 block using colocated nodes. Actual execution may vary with network conditions.
- Pulse — new pairs scanner — real-time feed of newly created tokens and migrations, with customizable filters to remove junk (documented in Axiom’s Pulse guide)
- Wallet tracking — follow any wallet on Solana and see their trades in real time. Great for watching what top traders are buying.
- Tweet Monitor — integrated Twitter/X feed that surfaces trending tokens and influencer mentions directly inside the terminal
- Migration sniper — automatically buy tokens the moment they migrate from Pump.fun to Raydium, landing in ≤ 1 block
- MEV protection — three modes (Off, Reduced, Secure) to protect your transactions from sandwich bots (according to Axiom’s fee documentation)
- Perpetuals — up to 50x leverage via Hyperliquid integration, directly inside the Axiom interface. (Leverage limits and fees are set by Hyperliquid and may change.)
- Yield — earn up to 15% APY on your assets through integrated staking via Marginfi, with instant withdrawals. (APY is variable and depends on Marginfi. Check axiom.trade for current rates.)
- Rewards system — according to Axiom’s documentation, every trade earns SOL cashback that increases as you climb volume tiers. Plus Axiom Points for potential future rewards.
What makes Axiom beginner-friendly?
I’ve spent hundreds of hours testing Solana trading platforms and writing beginner-friendly setup guides. Here’s what makes the Axiom Trade setup process stand out:
- Y Combinator backed: Axiom is backed by Y Combinator, one of the most selective startup accelerators in the world. This doesn’t guarantee anything — but it means the team has been vetted by serious investors.
- Web-first design: No Telegram app required. Axiom works in your browser with TradingView charts, a real dashboard, and a clean interface. If you’ve used Dexscreener or TradingView, Axiom will feel familiar.
- Multiple sign-up options: According to Axiom’s signup documentation, you can register with email, Google account, or connect a Phantom wallet — no mandatory KYC for basic usage, though requirements may vary by region.
- Built-in on-ramp: Through a Coinbase partnership, you can buy up to $500/week of crypto directly inside Axiom — no separate exchange needed.
- Competitive fees with cashback: According to Axiom’s fee documentation, the net fee starts at 0.95% (Wood tier) and drops to 0.75% (Champion tier) as your trading volume grows. Every trade earns SOL cashback.
Axiom vs Trojan vs GMGN (Quick Comparison)
Deciding between Solana trading platforms? Here’s a quick comparison to help you decide if the Axiom Trade setup is right for you:
| Feature | Axiom | Trojan | GMGN |
|---|---|---|---|
| Best for | Web terminal + analytics | Speed + Telegram + rewards | Research + smart money |
| Interface | Browser (desktop + mobile) | Telegram + Web | Web terminal + Telegram |
| Wallet tracking | ✅ Built-in + Tweet Monitor | Copy trading (wallets) | ✅ Smart money focused |
| Trading fee | 0.95% net w/ referral (source) | 0.9% w/ referral (source) | 1% (source) |
| Perpetuals | ✅ Via Hyperliquid | ❌ | ❌ |
| Yield/Staking | ✅ Up to 15% APY | ❌ | ❌ |
For a full breakdown with setup guides for each platform, see our main comparison guide.
Why Start From This Link?
Fair question. Here’s the honest answer.
When you open Axiom through this link, you’re using a referral link. This does two things:
- You get a 10% fee discount. According to Axiom’s referral documentation, referred users receive a 10% discount on trading fees. That discount applies permanently.
- I get a small referral reward. This is how I keep writing free guides like this one.
Same platform, same features, same security — but with a 10% fee reduction from day one. If you open Axiom without a referral, you’ll pay the full rate on every trade.
Clicking this link doesn’t commit you to anything. Explore the dashboard before doing anything.
Axiom Trade Setup — Pre-Setup Checklist
- A modern browser — Chrome, Brave, or Firefox (desktop recommended for full experience)
- Optional: Phantom wallet extension — if you want to connect an existing wallet (not required — you can sign up with email or Google)
- A small amount of SOL — $5 to $10 is plenty for your first test (or use Axiom’s built-in Coinbase on-ramp)
- 5 minutes of uninterrupted time (if you already have SOL — if not, allow 10–20 min)
1. The official website is axiom.trade — not any other domain. Bookmark it.
2. The official documentation is at docs.axiom.trade. Always cross-reference.
3. Axiom support is only available through their official Discord — nobody from Axiom will ever DM you first or ask for your recovery phrase.
If anything looks off, close it immediately and verify against docs.axiom.trade.
Axiom Trade Setup: Steps 1–4
-
Open Axiom Trade
→ Go to axiom.trade/@tokugawa in your browser.
→ Click “Sign Up” in the top right corner.
→ Choose your sign-up method: Email, Google, or Connect with Phantom.🔧 Which option? Email/Google = simplest (Axiom creates a wallet for you). Phantom = use your existing wallet. Both work fine for beginners.
-
Save Your Recovery Phrase
→ After signing up, Axiom shows you your secret recovery phrase.
→ Write it down on paper. Store it offline.
→ According to Axiom’s documentation, you can access it later in Account & Security settings. They also recommend importing it into a standard wallet like Phantom or Solflare for direct access.⚠️ This is your master key. If you lose it, nobody can recover your funds. Never share it with anyone — not me, not “Axiom support,” not anyone. If someone asks for it, it’s a scam.
Do NOT screenshot your recovery phrase — screenshots may sync to cloud backups and become a security risk. Write it on paper only.
-
Fund Your Account
→ Click the Deposit button (or the blue balance button) to see your wallet address.
→ Open the app where you hold SOL (Phantom, Coinbase, Binance, etc.).
→ Send $5 to $10 worth of SOL to the address shown in Axiom.🕐 Solana transfers usually arrive in under 10 seconds. If it takes more than 2 minutes, check the address on Solscan.
🔧 Don’t have SOL yet? Axiom has a built-in Coinbase on-ramp — buy crypto directly inside the platform. Verification requirements may vary by region and provider. Or buy on any major exchange, then send it to your Axiom wallet. (On-ramp limits and requirements may change. Confirm the latest on docs.axiom.trade.)
-
Check Your Balance
→ Your balance appears in the top of the Axiom dashboard.
→ You should see the SOL you just sent (or bought via Coinbase).If it shows up — you’re ready for the most important step: configuring your Axiom settings.
If you sign up with email or Google, Axiom creates a fresh wallet for you — this is the safest approach for beginners. If you choose to connect Phantom, be aware that you’ll be trading from that wallet directly. Never fund your Axiom trading wallet with your entire savings. Keep main holdings in a separate hardware wallet.
Axiom Trade Setup: Settings (Beginner Safe Defaults)
Do not skip this section. This is where most Axiom Trade setup mistakes happen. Getting your settings right before your first trade is more important than which token you buy.
In Axiom, click the gear icon (⚙) or go to Global Settings. Configure these four things:
Slippage
According to Axiom’s documentation, slippage controls the maximum price shift you’ll accept between clicking “buy” and the trade executing.
Recommended starting point: 5–10% for memecoins, 1–3% for established tokens.
If a trade fails with “slippage exceeded,” increase by +3–5% and retry. Only use higher values during fast launches.
💡 What’s slippage? Think of it like buying coffee for $5 — a 10% slippage means you’re OK paying up to $5.50 if the price moves. (See our best slippage settings for Solana bots)
Priority Fee & Bribe
According to Axiom’s documentation, you can adjust two separate network fee settings:
- Priority Fee: Default
0.001 SOL— pays validators for faster confirmation ✅ Start here - Bribe (Jito Tip): Additional tip during congestion to ensure your transaction lands
These fees go to Solana validators — Axiom does not collect them. During high congestion, Axiom automatically suggests the best tip amount.
You can set a maximum priority fee in Global Settings so you never overspend on gas. (See our Solana priority fees explained)
MEV Protection
According to Axiom’s documentation, MEV Protection has three modes:
- Off: No MEV protection (fastest, but vulnerable to sandwich attacks)
- Reduced: Partial protection — good balance of speed and safety
- Secure: Routes to whitelisted validators only — strongest protection, may be slightly slower
For your first test trade: Leave it on Reduced for a good balance. Switch to Secure for larger trades where protection matters more than speed.
Buy Amount Presets
Axiom lets you set preset buy amounts for one-click trading. Set a small default you’re comfortable losing entirely — for example, 0.05 SOL. You can override this per-trade. The point is a safe default so you never accidentally buy with more than intended.
Note: Axiom Trade setup settings are in the gear icon (⚙) or Global Settings. Look for “Slippage,” “Priority Fee,” “Bribe,” and “MEV Protection.” If your trade fails, see our guide on why Solana bot trades fail.
Axiom Trade Setup: Your First Test Trade
Settings configured? Your Axiom Trade setup is almost complete. Now let’s do a real trade.
Not sure what to buy for your test? Start with an established, liquid token (like a top-50 Solana token with tight spreads) — avoid brand-new microcaps for your first try. Save memecoins for after you’ve nailed the basics.
→ Paste a token contract address (CA) or ticker into the Axiom search bar at the top.
→ Axiom loads a full trading page: TradingView chart, price, liquidity, holders, and trade history.
→ Enter your buy amount (or use your preset) → click “Buy” → confirm.
You’ll see a confirmation showing how much you paid, how many tokens you got, and a transaction link you can verify on Solscan.
🎉 That’s it. You just completed the core Axiom Trade setup and made your first trade.
→ To sell: go to your Portfolio tab, find your position, and click “Sell”. You can sell 25%, 50%, 75%, or 100% with one click. Or use the Instant Trade popup next to the chart for even faster execution.
Axiom Trade Setup: Key Features (Pulse, Wallet Tracking & Rewards)
1. Pulse — New Pairs Discovery
Pulse is Axiom’s real-time feed of newly created tokens and migrations. According to Axiom’s documentation, it tracks token launches and migration milestones (like bonding-curve completion on Pump.fun → Raydium migration) so you can spot opportunities as they happen.
You can customize filters to remove junk tokens and obvious rugs — only showing tokens that match your criteria (liquidity, volume, holder count, etc.). The Explore page ranks new and trending pairs to help prioritize your watchlist.
Bundle Detection: According to Axiom’s FAQ, the platform detects coordinated bundle buys across a token’s entire lifetime — not just at launch. This helps flag insider activity that other tools may miss.
2. Wallet Tracking & Tweet Monitor
Axiom lets you follow any Solana wallet and see their trades in real time directly inside the terminal. This is how traders “follow the smart money” — watching what top performers are buying before a token pumps.
The Tweet Monitor integrates Twitter/X feeds directly into your dashboard, surfacing influencer mentions and trending tokens without leaving Axiom.
Safety: Watch wallets for several days before acting on them. Some traders use multiple wallets to manipulate copy traders. Never ape into a token just because a tracked wallet bought it — always verify the token independently.
3. Migration Sniper & Instant Trade
According to Axiom’s documentation, the migration sniper automatically buys tokens the instant they migrate from Pump.fun to Raydium, landing in ≤ 1 block. This eliminates the need for separate sniper bots.
The Instant Trade feature, documented in Axiom’s guide, is a one-click buy/sell popup next to your chart. You can even use hotkeys to buy and sell without touching the mouse.
Advanced Strategies: Axiom lets you set your entire trading strategy in one click — buy a token and simultaneously place limit orders for take-profit and stop-loss.
4. Rewards & Points System
According to Axiom’s reward documentation, every trade earns SOL cashback. Your cashback rate increases as you trade more:
- 🪵 Wood (1x): 0.05% cashback · Net fee: 0.95%
- 🥉 Bronze (2x): 0.10% cashback · Net fee: 0.90%
- 🥈 Silver (2.5x): 0.125% cashback · Net fee: 0.875%
- 🥇 Gold (3x): 0.15% cashback · Net fee: 0.85%
- 💿 Platinum (3.5x): 0.175% cashback · Net fee: 0.825%
- 💎 Diamond (4x): 0.20% cashback · Net fee: 0.80%
- 🏆 Champion (5x): 0.25% cashback · Net fee: 0.75%
Additionally, you earn Axiom Points for trading and referrals — these contribute to leaderboards and potential future rewards.
Note: Reward rates, tiers, and terms may change. Always check axiom.trade for current details.
“Cashback” and “rewards” don’t mean “guaranteed profit.” The tokens you buy can and do lose value — many go to zero. Rewards offset fees but don’t eliminate trading risk. Every trade can still go to zero.
Perpetual futures (via Hyperliquid integration) carry additional risk from leverage. If you’re new, stick to spot trading until you fully understand how leverage works.
Axiom Trade Setup — Safe Test Rules for Beginners
Trading memecoins is risky. Most new tokens lose value. Some go to zero. This Axiom Trade setup walkthrough is safety-first.
Rule 1: Only use money you can afford to lose completely.
Your first $5–10 is tuition. If it goes to zero, you’ve learned a valuable lesson for cheap.
Rule 2: Start with $5–10. Not $50. Not $100.
Get comfortable with the mechanics first. THEN increase.
Rule 3: Don’t chase hype.
“THIS TOKEN IS GOING 100X” usually means it already went up and you’re about to buy the top.
Rule 4: Check the token before buying.
Use Axiom’s built-in charts and data, plus Solscan, Dexscreener, or Birdeye to verify liquidity and contract details. Axiom’s bundle detection can help flag suspicious tokens.
Rule 5: Use limit orders.
Axiom’s limit order system lets you set take-profit and stop-loss levels. Use them so you don’t have to stare at your screen all day. Set your entire strategy with one click using Advanced Strategies.
Suggested first test amounts: Very cautious: $3–5 · Standard beginner: $5–10 · Comfortable with crypto: $10–20
These are NOT investment recommendations. They’re reference points for learning.
Why This Approach Works (The Science Behind It)
Loss aversion (Kahneman & Tversky): People feel losses about twice as strongly as gains. Start with $5, lose $3, and you think “let me try again smarter.” Start with $100, lose $50, and you probably quit forever.
Cognitive load theory: Learning a new tool AND making financial decisions at the same time overloads your brain. Tiny money removes financial stress so you can focus on the Axiom Trade setup process.
Minimum viable test: Test a system with the smallest possible stake before committing more. Professional traders do this. You should too.
Separation of funds: Keep your main holdings in a hardware wallet. Only send small amounts to your Axiom trading wallet. If anything goes wrong, your main funds stay safe.
Axiom Trade Setup — FAQ (Honest Answers)
Q1: “Is Axiom Trade a scam?”
Axiom is a non-custodial platform — you hold your own wallet keys, not Axiom. The platform is backed by Y Combinator and uses Turnkey’s security infrastructure for wallet management. Like ANY trading tool, bad trades mean lost money. Always verify you’re on the official domain axiom.trade. Nobody from Axiom will ever DM you first or ask for your recovery phrase.
Q2: “Is Axiom hard to use?”
Axiom has more features than most Solana platforms, which means there’s a lot to explore. But your first trade is simple: search a token → click Buy → confirm. The dashboard looks complex at first, but you only need the search bar and buy button to start.
Q3: “What if I lose money?”
You probably will lose some while learning. That’s normal. That’s why we start with $5–10. No trading platform guarantees profits.
Q4: “What are the fees?”
Per Axiom’s documentation: 1% base fee per swap, with cashback ranging from 0.05% (Wood tier) to 0.25% (Champion tier), making net fees 0.95% to 0.75%. Referral users get an additional 10% discount. Plus Solana network fees (priority fee defaults to ~0.001 SOL). Perpetual trades via Hyperliquid carry a separate 0.01% fee per transaction.
Q5: “What about taxes?”
Crypto trades may be taxable. In the US, each trade is a taxable event. Axiom shows PnL and trade history in the Portfolio tab. Consult a tax professional.
Q6: “Can I get hacked?”
The biggest risk is phishing — fake sites that look like Axiom. Bookmark axiom.trade and only use that URL. Never share your recovery phrase. Enable 2FA on your email/Google account. According to Axiom’s documentation, wallets are secured by Turnkey’s non-custodial infrastructure with air-gapped architecture.
Q7: “What’s better — Axiom, Trojan, or GMGN?”
Axiom excels at web-based trading with a full dashboard (charts, wallet tracking, Tweet Monitor, perpetuals, yield). Trojan excels at Telegram speed and copy trading. GMGN excels at smart money research. No single “best” for everyone. See our full comparison.
Q8: “What if I want to stop?”
Withdraw your SOL back to your main wallet. You own the recovery phrase — no lock-in, no cancellation fee. You can also import your Axiom wallet into Phantom or Solflare for direct access at any time.
Q9: “Do I need Telegram to use Axiom?”
No. Axiom is a 100% web-based platform. You only need a browser. It also works on mobile browsers — just open axiom.trade on your phone.
Q10: “What’s MEV Protection?”
Per Axiom’s documentation, MEV Protection prevents sandwich bots from extracting profit from your trades. Three modes: Off, Reduced, Secure. Secure routes to whitelisted validators for the strongest protection. Use Reduced for everyday trades, Secure for large amounts.
Q11: “Can I buy crypto directly on Axiom?”
Yes. According to Axiom’s FAQ, through a Coinbase partnership, you can buy crypto directly inside Axiom. Verification requirements may vary by region and provider. Limits and features may change; check docs.axiom.trade for the latest.
Q12: “What are Axiom Points?”
Per Axiom’s documentation, Points are earned through trading and referrals. They contribute to leaderboards and potential future rewards. Many users speculate about a future token airdrop — but nothing is confirmed. Points accumulate automatically as you trade.
Real Axiom Trade for Beginners Scenarios
Scenario A: “I’ve Never Traded Crypto Before”
Alex signed up for Axiom with his Google account, used the Coinbase on-ramp to buy $10 of SOL directly inside the platform, and spent the first hour just exploring Pulse and watching token charts. His first test buy on a liquid token went down 8% — he sold and lost $0.80. But he learned how to buy, sell, set slippage, and verify on Solscan. The next day, he tried a limit order. By the end of the week, he was comfortable enough to increase to $25 and start tracking wallets. Slow, steady, no panic.
Scenario B: Busy Professional — “I Have 10 Minutes a Day”
Maria set up Axiom in 5 minutes on her work laptop, used Advanced Strategies to set buy + take-profit + stop-loss in one click, and followed three whale wallets in the Tracker tab. She checks Axiom twice daily — once to scan Pulse for new tokens, once to check positions. Trades execute automatically based on her limit orders. Total time: ~10 minutes per day.
Scenario C: Security-Focused — “I Don’t Trust Anything”
Ken signed up with a burner email, created a fresh wallet (didn’t connect Phantom), keeps only $15–20 in it, wrote his recovery phrase on paper, and imported it into Phantom as a backup. He enabled 2FA on his email account and bookmarked axiom.trade to avoid phishing. Main portfolio stays untouched in cold storage.
It’s Time to Start
You’ve read the guide. You understand the risks. Axiom setup takes under 5 minutes if you already have SOL ready — and costs nothing until you trade.
Start with a fresh wallet and a tiny test trade first — then scale up only after you’ve verified every step.
Then follow Steps 1–4, configure your Axiom settings, and make your first test trade.
Axiom Trade Setup — 3-Line Quick Start
2. Settings: Slippage 5–10%, Priority Fee 0.001 SOL, MEV Protection Reduced, small buy preset
3. Search a token CA → Check chart/liquidity → First small test buy
(Verify you’re on axiom.trade · Backed by Y Combinator · Docs at docs.axiom.trade)
Axiom Trade Setup — Completion Checklist
- Opened Axiom through the referral link (10% fee discount activated)
- Signed up with email, Google, or Phantom
- Saved my recovery phrase in a safe offline location
- Enabled 2FA on my email/Google account
- Funded my Axiom wallet with a small amount of SOL ($5–10)
- Confirmed my balance shows up in the dashboard
- Set slippage to 5–10% for memecoins
- Set priority fee to ~0.001 SOL
- Set MEV Protection to Reduced
- Set a small default buy amount preset
- Made my first test trade
- Verified the transaction on Solscan
- Know how to sell from the Portfolio tab
- Explored Pulse (new pairs) and the Explore page
- Bookmarked axiom.trade to avoid phishing
All boxes checked? You’re officially set up. Welcome to Axiom. ⚡
What to Do Next
→ Best Solana Trading Bots — Full Comparison
→ Trojan Bot Setup for Beginners
→ GMGN Bot for Beginners — Setup Guide + Smart Money
→ BONKbot Setup for Beginners — Telegram Trading + Telemetry
→ Best Slippage Settings for Solana Bots
→ Solana Priority Fees Explained
→ Axiom Official Documentation (full feature reference)